When installing the Exinda AD Connector on a server that is not a domain controller, ensure that the account in charge of running the service is an Active Directory domain admin account.
-
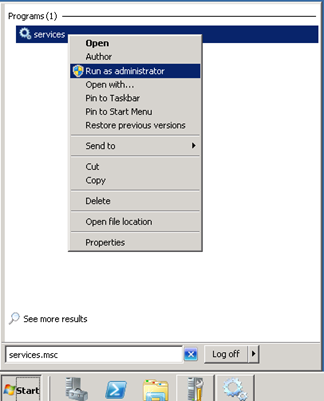
Run Services.msc as an Administrator.
- Find Exinda AD service and right click on it and select Properties.
-
On the Log On tab, select the Administrative account of the domain with its password.
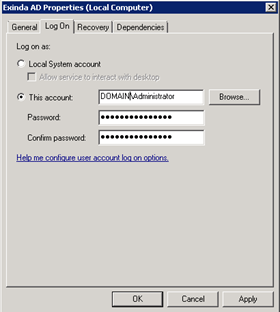
Note that the domain and slash (\) is required.
- Press OK or Apply to save the changes.
- Restart the service.